

In woodworking DIY, you often need to cut wood at right angles with a hand-saw, but it’s really hard to get it perfect.
In such cases, a jig can be quite useful. A jig is any tool used to help with completing tasks, and a saw guide is one of them.
This article will help you make a highly effective and easy-to-build hand saw guide.
There are three kinds of saw guides, depending on how difficult they are to make and their accuracy. You can choose and read about them as you like.
《For beginners》Magnetic guide blocks for hand saw
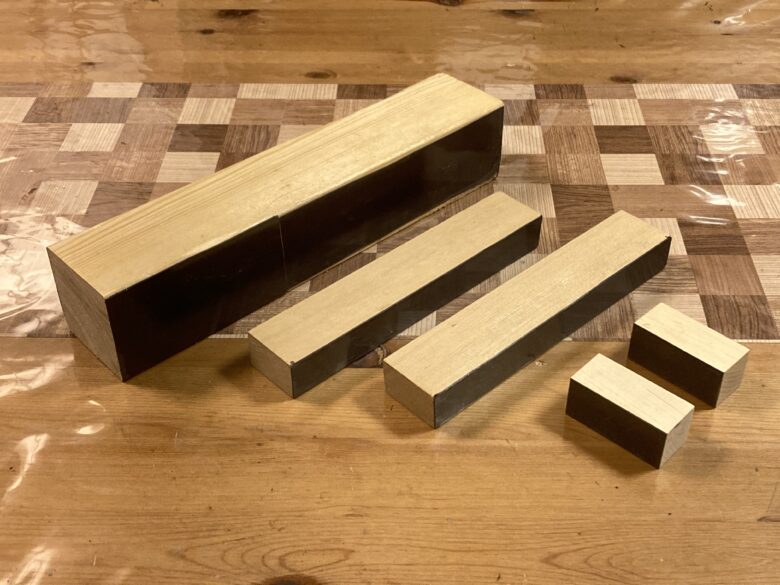
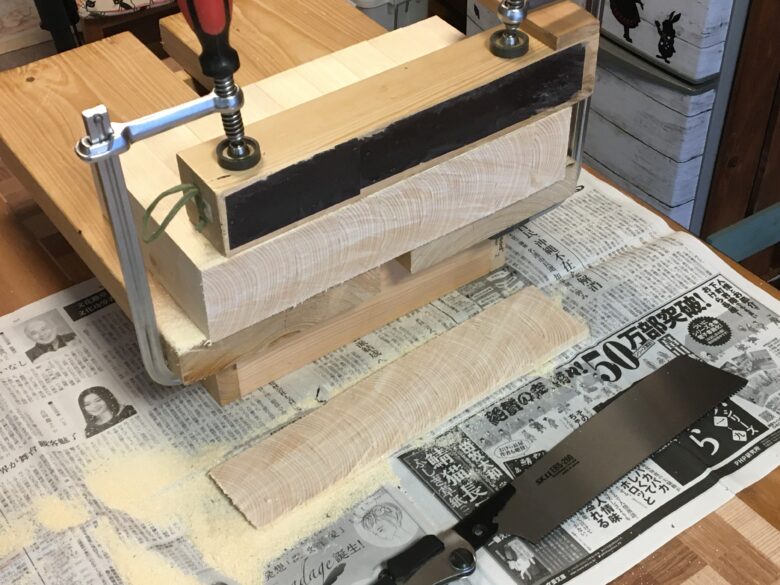
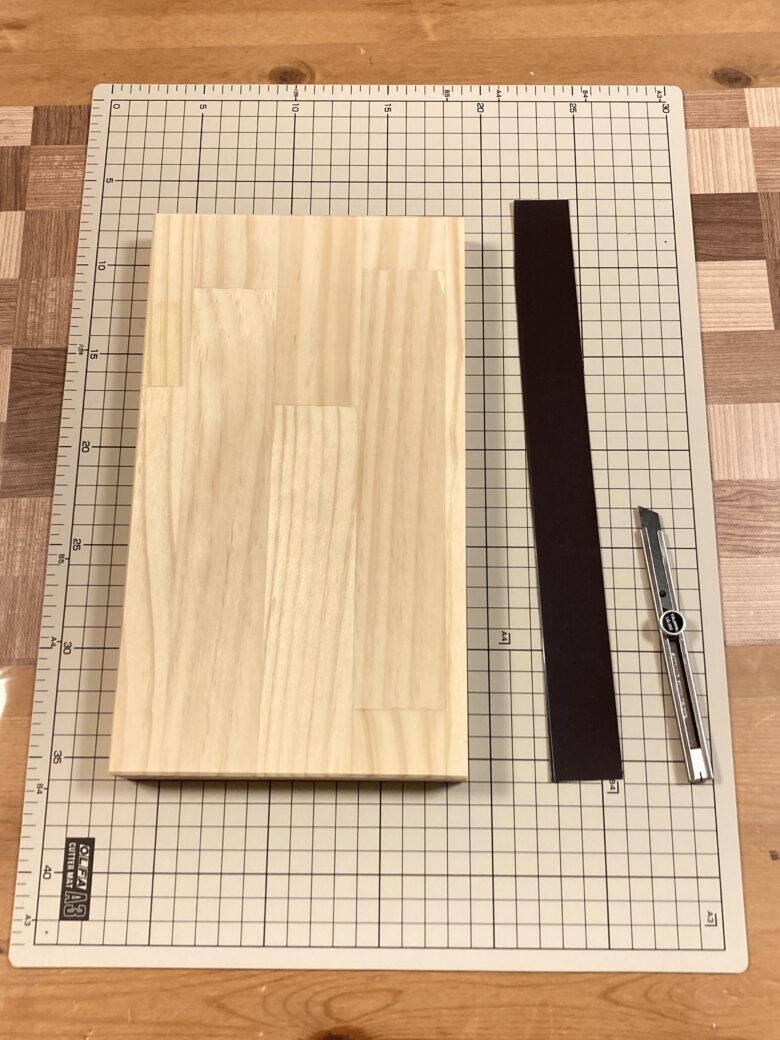
The simplest jig is a magnetic saw guide block as shown in the photo above. The black part is a magnetic sheet.

What's this... squared timbers?
These are the jigs. It allows you to cut straight with a hand saw.

How to make a magnetic hand saw guide block
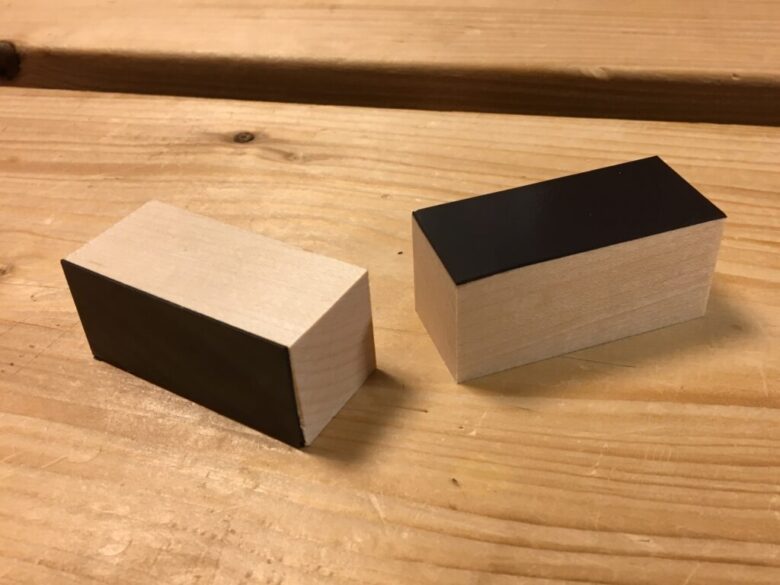
It is very easy to make a magnetic hand saw guide block. Simply attach an adhesive magnetic sheet to a square piece of wood. The saw blade sticks to the magnetic sheet, which makes it work as a saw guide.
If you don’t have any magnetic sheets, you can also drill holes in the wood and embed magnets instead.
How to use a magnetic saw guide block
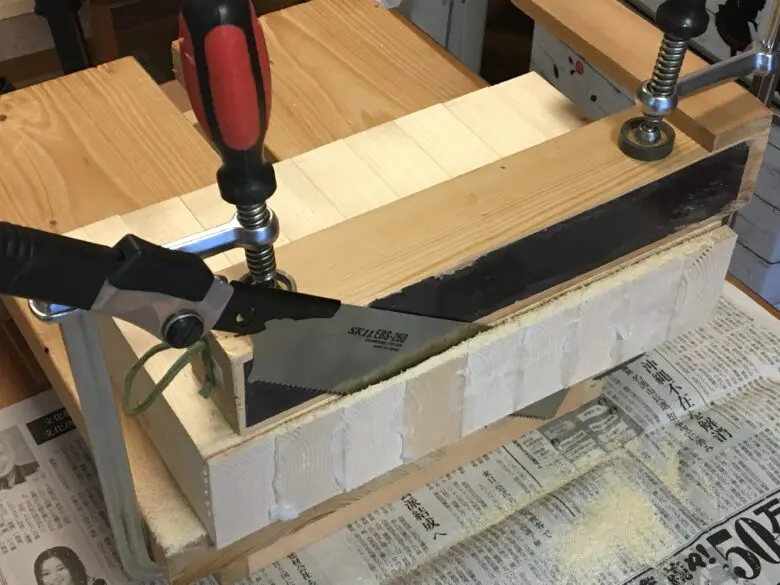
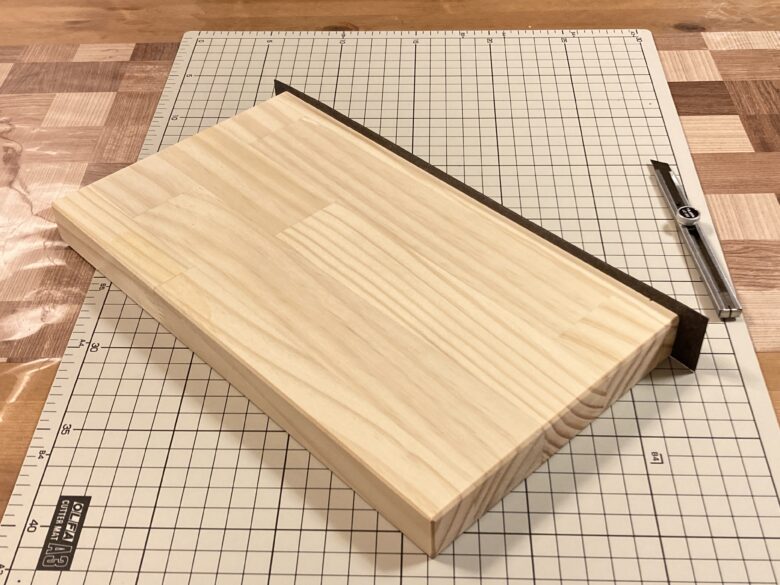
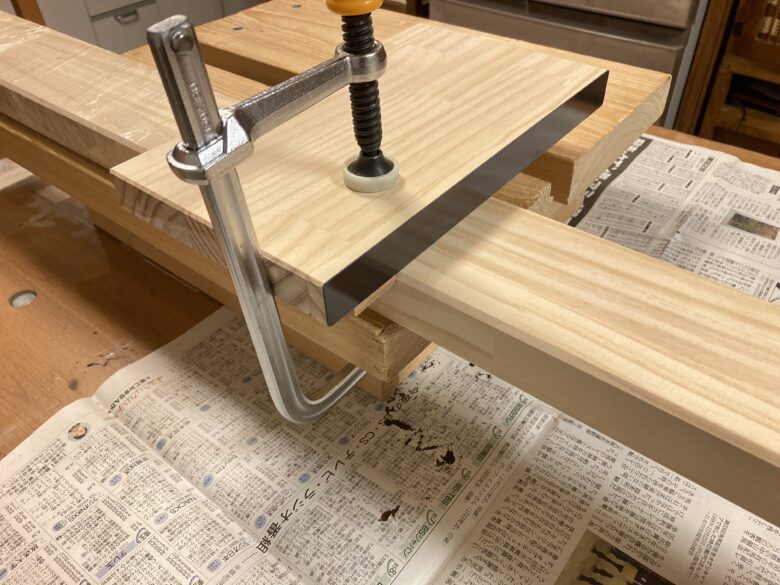
You can either attach it to the workpiece with double-sided tape or secure it with clamps.
For example, clamp the workpiece and magnetic hand saw guide block together as shown below.
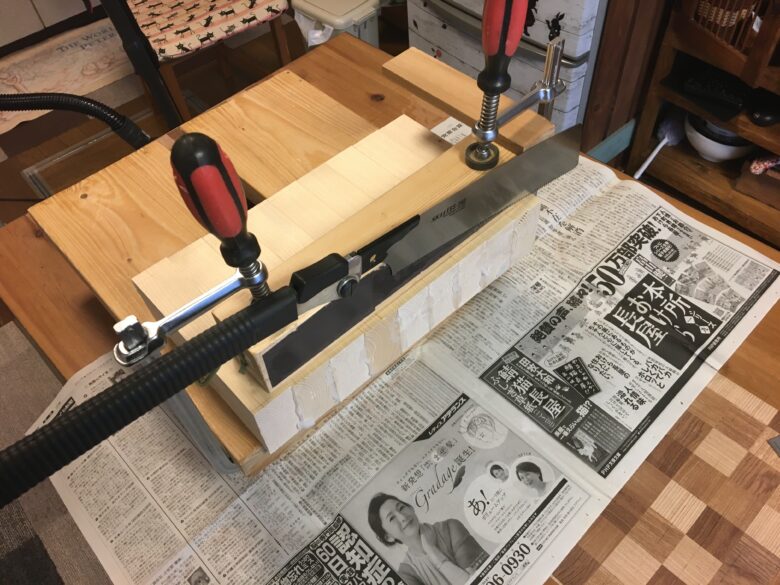
Leave the saw blade attached to the magnetic sheet and move it back and forth.
This will help you cut straight and perpendicular!
If you don't have a workbench to clamp on to, try building a small workbench like I did.

What you can do with the guide blocks
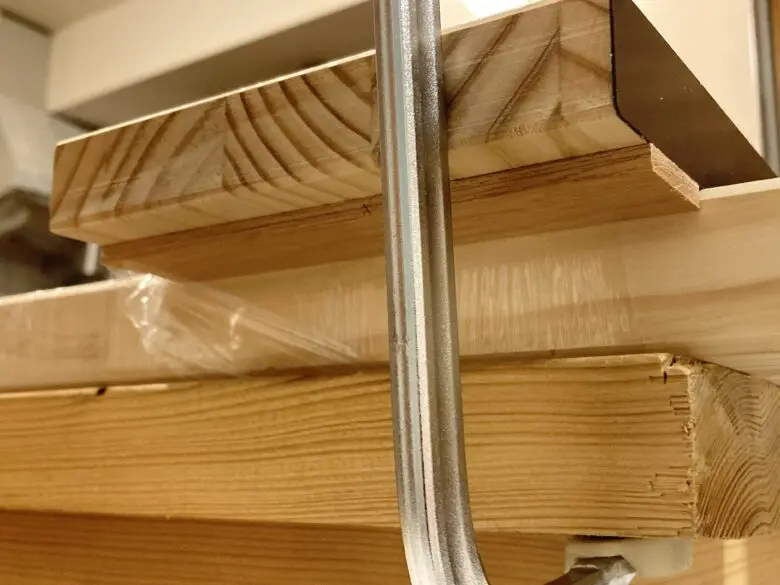
Using magnetic hand saw guide blocks allows for precise grooving as well.
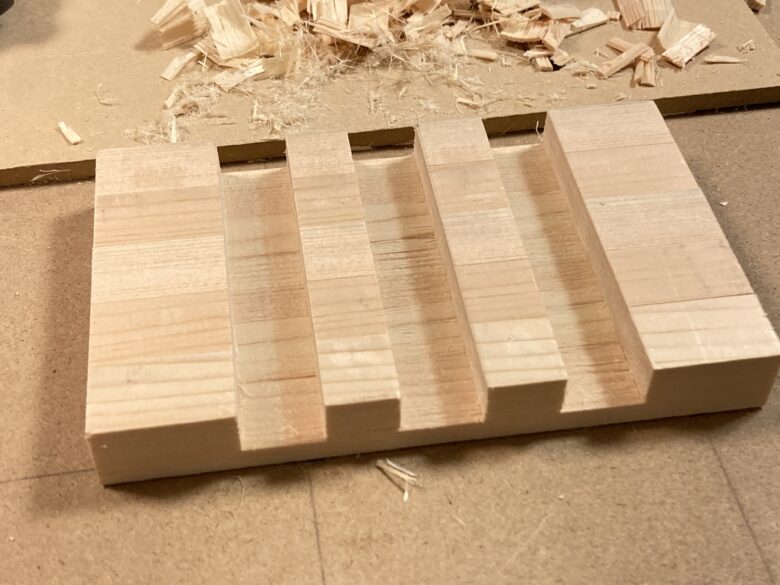
The photo above shows thin square timbers attached with double-sided tape and grooved all together.
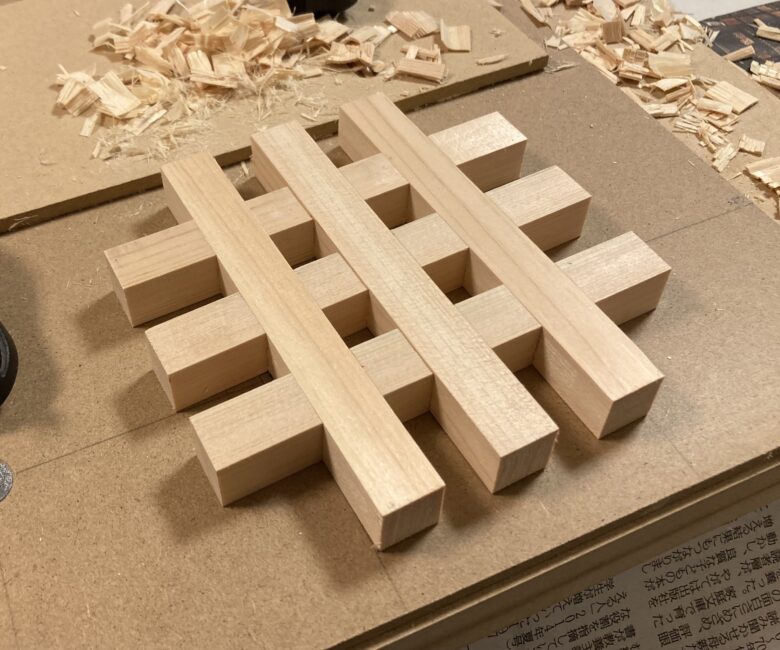
If you take the attached pieces apart and put them together, you can make a trivet with halved cross joints.
This is explained in detail in another article, so if you are interested, please read it later.

But with this method, you need a square each time to get a right angle, right?
A little troublesome...
If you feel so, I recommend the "magnetic cross-cut guide for hand saw" explained next.
《For intermediates》Magnetic cross-cut guide for hand saw
The magnetic hand saw guide block is very useful, but cannot be used to cut a right angle.
An alternative is a Magnetic cross-cut guide for hand saw. In Japan, this technique is known as the 'Sugita woodworking method'.
You will be able to cut almost any type of wood accurately at right angles with this jig.
If you want to do accurate woodworking, this jig is the first thing you need, so be sure to try making one.
How to make a magnetic cross-cut guide for hand saw
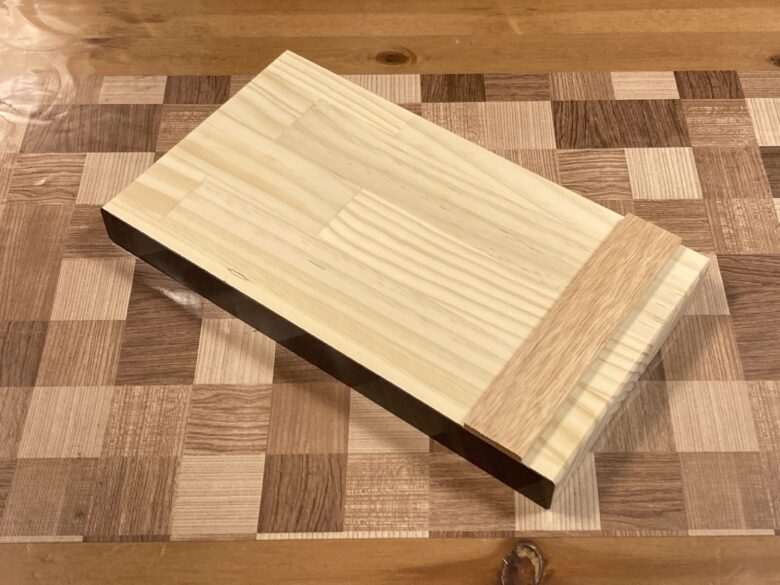
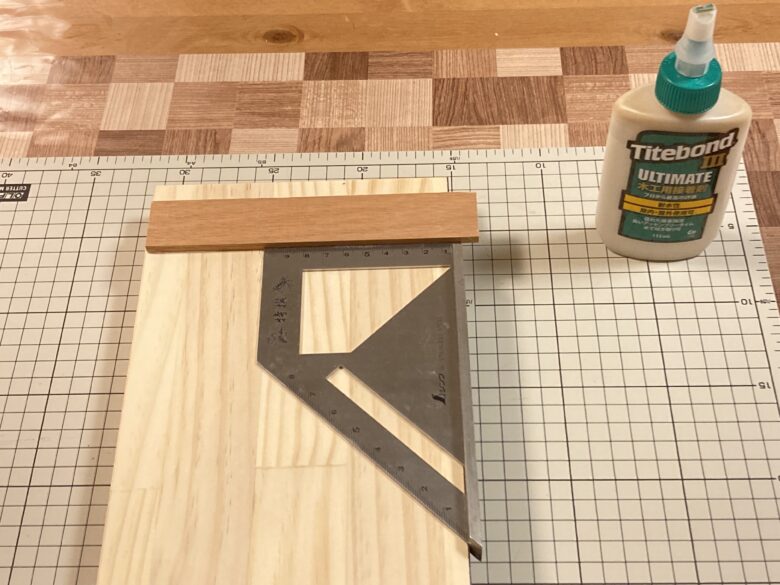
This is the magnetic cross-cut guide for hand sawing. To make it, you have to attach a right-angle fence onto a base board.
Materials of the right-angle saw guide
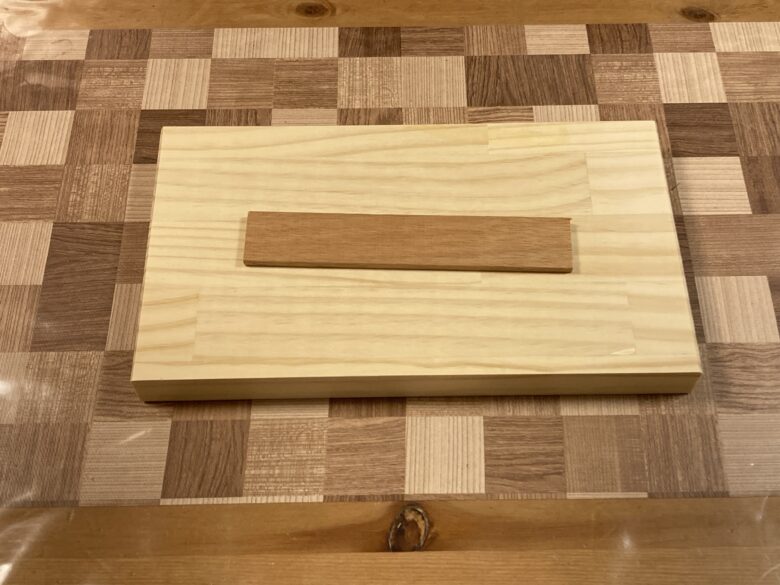
The magnetic cross-cut guide for hand saw is made of three materials. The base-board (the larger one in the photo above), the fence-board (the brown one), and the magnetic sheet(not shown).
Although it looks simple, there are important points to improve accuracy.
The base-board requirements
The best material for base-board is one that will not warp or twist, so I used 250 x 150 x 24mm laminated pine wood. The greater the material thickness, the better the accuracy.
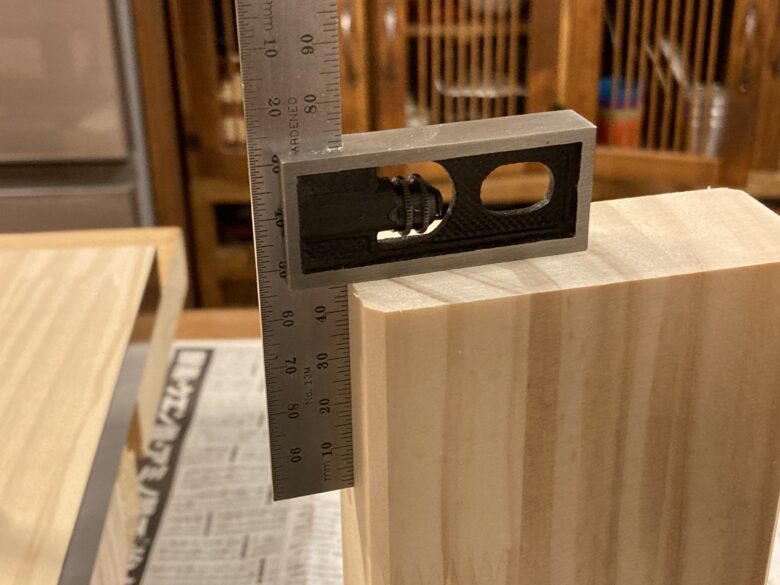
Make sure that the edge of the base-board (to which the magnetic sheet is attached) is straight and perpendicular, or 'square'.
The fence-board requirements
You can use any type of wood for the fence-board, but it must not have any warping, bending or twisting, and must have the straight edge.
I used 160 x 30 x 5mm sized wood. The length should preferably be slightly longer than the base-board.

How to assemble the magnetic cross-cut guide for hand saw
step
1Attach a magnetic sheet to the edge of the base-board.
Prepare a larger magnetic sheet and stick it on first; then, trim the edges with a cutter for a clean finish.

step
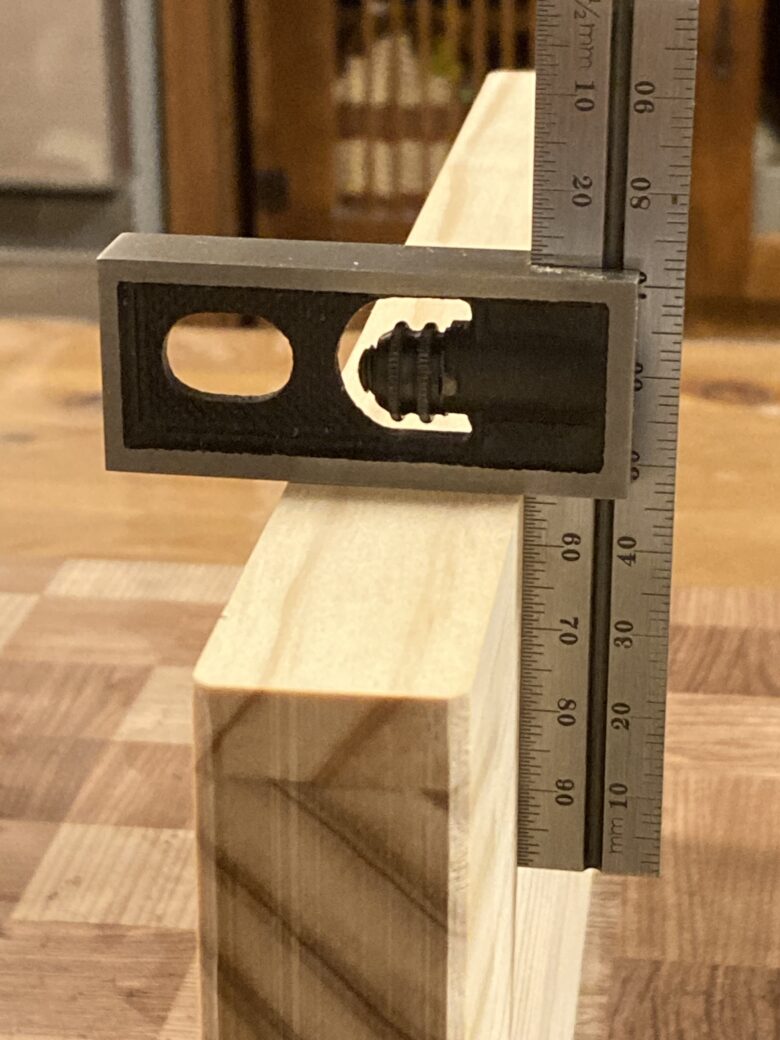
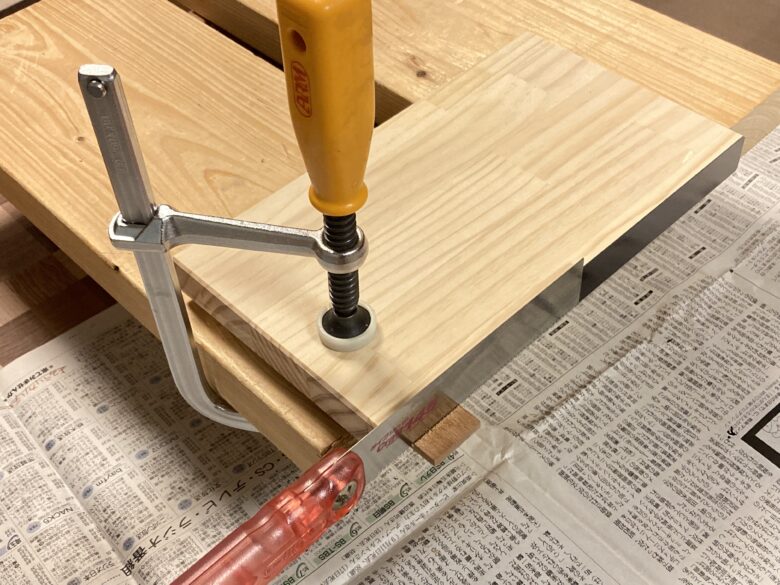
2Attach the fence-board to the base-board.
This is the most important part!!
When attaching the fence-board, position a square approximately 30~50 mm away from the edge (short side) of the base-board, and ensure that the fence-board is perpendicular to the magnet sheet as you glue it on.
Attach the fence-board with a slight overhang over the magnet sheet. This will help you trim the excess later to make it flush.
The fence-board might move while the glue is drying, so keep an eye on it now and then until it’s fully set.
Don’t we use screws or nails here?
I wouldn't do that. The wood grain might make them shift a bit.
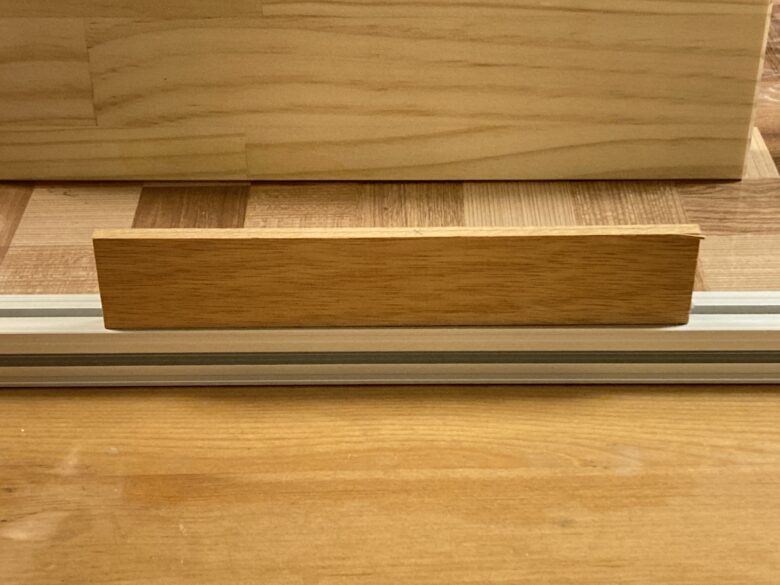
step
3Trim off the excess fence-board.
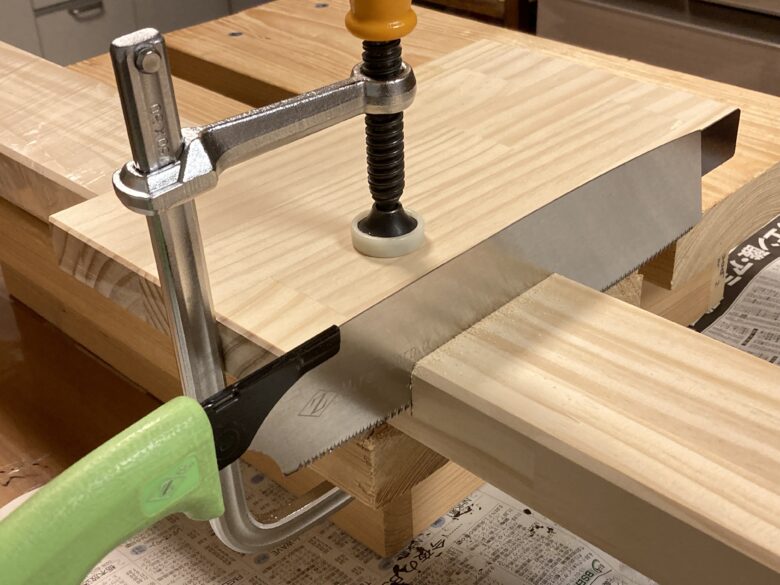
After the glue is completely dry, turn everything over, clamp it down to the workbench, and use a saw to trim off the excess fence-board.
It’s better to use a saw without the set-teeth here, because the set-teeth might damage the magnetic sheet.
How to use a magnetic cross-cut guide for hand saw
Clamp the magnetic cross-cut guide together with the material for use. When placing the guide on the material, ensure the back fence is flush against the material.
If the fence is flush with the material, the magnet sheet surface will be at a perfect right angle, vertically aligned, and straight.
At this point, put the saw blade on the magnet sheet and cut slowly.
Be sure to keep the saw blade touching the magnet sheet at all times.
Watch out for the front part of the saw blade wobbling left and right. We moved the fence back by 50 mm to avoid that.
The results from using this magnetic cross-cut guide are shown in the picture below.
The horizontal right-angle accuracy is very high, and it’s at the highest level of precision for hand saw cuts.
While the vertical precision is quite good, there may be some minor errors as shown below.

Wait, are there errors in that picture?
There’s a little gap at the left edge if you look closely, so it’s not perfectly vertical. But if that doesn’t bother you, it’s fine.
Vertical errors occur because the magnet sheet is narrower than the saw blade.
To improve vertical precision, you can thicken the base-board and widen the magnet sheet to over 40 mm. (Just be aware that this will make the saw harder to pull.)
《For experts》Adjustable magnetic cross-cut guide for hand saw
The magnetic cross-cut guide we made earlier can't fix the errors that happen when you’re cutting. Actually, you still get errors sometimes due to your manual work or bending of the fence-board.
Therefore, I implemented the following three improvements:
- Making the base plate 36mm thick for better vertical precision;
- Changing the fence-board to an aluminum one to reduce deformation errors;
- The fence-board was secured using bolts and nuts embedded in the base-board, allowing for fine adjustments of the angle.
.jpg)
Making these improvements means I’ve run into these problems myself.
If there are any errors when using the guide for cutting, you can adjust them by loosening the aluminum fence and fine-tuning the angle.
I’ll skip the detailed instructions, but you can look at the miter-cut article, which covers a similar jig.

Overview
For those who are just starting with DIY, as well as for those with some experience, cutting wood at a right angle can be a challenging task.
However, any woodworking project begins with cutting the wood at a right angle. Being able to make precise right-angle cuts is the first step.
It is said that you can master this skill with years of practice, but for us DIYers, spending years practicing with a saw isn't realistic. This is where the 'jig' that I introduced comes in as a practical solution.
Jigs are incredibly useful, but they do have their limitations when it comes to precision. This isn't necessarily a bad thing, as it means that the accuracy can be adjusted depending on how the jig is made.
From my experience, I can say that:
- The precision of a jig directly reflects the accuracy of the materials used to make it.
- If the jig is large, it will be more precise but harder to handle.
- If the jig is small, it will be easier to handle but less precise.
- In the case of jigs, bigger does not necessarily mean better.
The level of precision you achieve with a jig is entirely up to you, and if you are determined, you can pursue accuracy to any extent.
The jig introduced this time is easy to make and use, even for beginners, but I hope this will serve as an opportunity for you to discover the joy and depth of making your own jigs.
Once you get comfortable with making right-angles, I think you’ll find it interesting to challenge yourself with miter-cuts next. Although the complexity of the jig will increase, once the jig is made, miter cuts become easy to execute. If you're interested, please check out this related article as well.